

close
Choose Your Site
Global
Social Media


Views: 0 Author: Site Editor Publish Time: 2026-10-21 Origin: Site


A broken interior door handle creates immediate operational frustration and a serious safety hazard. This high-wear component degrades from constant pulling, temperature fluctuations, and material fatigue. When a handle fails, it traps occupants inside the vehicle or prevents the door from latching securely. Dealership repairs for door handle assemblies carry inflated labor costs. DIY replacements pose specific risks. You can easily damage delicate door panels, tear wiring harnesses, or snap retaining clips without a precise methodology. This guide provides a technical breakdown of the installation process. We objectively compare replacement parts, from full assemblies to quick-fix covers. You will learn specific risk mitigation strategies to execute a professional-grade repair. By understanding mechanical linkages and proper teardown sequences, you restore full functionality to your vehicle's doors while avoiding collateral damage to the interior trim.
Component Selection Dictates Longevity: Choosing between OEM, aftermarket, or upgraded materials directly impacts the lifespan and tactile feel of the repair.
Accurate Diagnosis Prevents Wasted Effort: Verifying whether the failure lies in the handle housing, the linkage cable, or the door latch actuator is a mandatory first step.
Preparation Prevents Damage: Proper trim removal tools and an understanding of hidden fastener locations are critical to preserving the door panel handle trim and retaining clips.
Installation is a Sequential Process: Successful replacement requires strict adherence to the teardown order—specifically regarding window positioning, battery disconnection, linkage detachment, and tension testing before reassembly.
Alternative Solutions Exist: For cosmetic degradation (like melting rubberized plastics) without mechanical failure, snap-on covers offer a viable, low-risk alternative to full assembly replacement.
Defining the success criteria for a replacement handle ensures a lasting repair. Mechanical reliability means the pivot pin will not snap under daily tension. Aesthetic match ensures the texture and color blend with the factory interior. Budget alignment keeps the repair economical without sacrificing safety. Fixing specific manufacturer defects, such as melting rubberized plastics, requires selecting upgraded materials rather than repeating factory mistakes.
Comparing OEM and aftermarket parts reveals distinct advantages for each approach. OEM parts offer an exact fit and perfect color matching. However, they carry a higher cost and retain the exact same wear vulnerabilities that caused the original failure. If the factory used brittle ABS plastic, the OEM replacement will eventually suffer the same fate. Aftermarket alternatives often provide a more cost-effective solution. Many aftermarket manufacturers re-engineer these components using PC/ABS blends. They frequently feature reinforced metal pivot points and thicker plastic housings. This corrects factory design flaws and extends the component's lifespan significantly.
Evaluating an upgrade to a leather-wrapped handle involves several dimensions. Leather provides enhanced tactile feedback and elevates the interior aesthetic. Fitment tolerances remain tight, ensuring the handle operates smoothly within the door panel housing. Maintenance requires simple conditioning to prevent the material from drying out. Upgrading to a leather car interior door handle permanently solves the sticky plastic problem. This issue happens frequently in European vehicles where rubberized interior grips degrade rapidly under UV exposure and contact with human skin oils. The leather wraps over the hard plastic base, creating a barrier that will not melt or turn into a sticky paste.
Snap-on covers offer a highly viable solution for addressing sticky or cosmetically degraded handles. This applies strictly when no mechanical failure has occurred. If the handle still opens the door smoothly, a cover saves significant time. The primary trade-off involves installation speed versus fitment bulk. A cover installs in minutes, whereas a full assembly replacement takes hours. Covers add slight thickness to the handle profile. Long-term adhesive and snap durability depend heavily on surface preparation. You must thoroughly degrease the old handle using isopropyl alcohol. This removes all sticky residue and ensures the snap-on car door handle cover seats securely without shifting during use.
Option Type | Material Quality | Fitment Accuracy | Best Application |
|---|---|---|---|
OEM Assembly | Factory ABS Plastic | Exact Match | Restoring original factory condition |
Aftermarket Assembly | PC/ABS Blend | High | Budget repairs and reinforced pivot points |
Leather Upgraded Handle | Leather over ABS | High | Fixing melting rubberized grips permanently |
Snap-On Cover | Molded Plastic | Moderate | Quick cosmetic fixes without panel removal |
Proper diagnosis dictates your entire repair strategy. You must isolate the issue before ordering parts or removing panels. A floppy handle usually indicates a snapped return spring or a broken cable ferrule inside the housing. A stiff handle that refuses to pull points to a failing latch actuator deep inside the door. You must verify this mechanically to avoid replacing the wrong component.
Observed Symptom | Mechanical Cause | Required Action |
|---|---|---|
Handle flops loosely | Snapped return spring | Replace entire handle housing |
Handle pulls but door stays shut | Broken cable ferrule or stretched wire | Replace Bowden cable |
Handle feels extremely stiff | Seized door latch actuator | Lubricate or replace internal latch |
Black sticky residue on hands | Degraded rubberized coating | Install snap-on cover or leather upgrade |
Executing this repair without damaging the vehicle requires specific non-negotiable tools. Using improvised tools like flathead screwdrivers will gouge the plastic and scratch the paint.
Nylon pry tool set to safely unseat trim pieces without leaving marks.
Comprehensive Torx (T15, T20, T25) and Phillips screwdriver sets.
A 90-degree metal pick or hook tool for releasing stubborn electrical connectors.
A bulk pack of vehicle-specific replacement plastic retaining clips.
A roll of automotive butyl tape for resealing the vapor barrier.
A magnetic parts tray to organize various screw lengths.
A 3/8 inch drill bit and power drill (if removing melted plastic rivets).
Locating hidden screws requires patience and a systematic approach. Manufacturers conceal fasteners behind the door panel handle trim, underneath armrest rubber mats, and behind speaker grilles. Look for small plastic caps that blend into the surrounding texture. Carefully pry these caps off using a fine-tipped pick tool. Evaluate the current state of the door panel before applying heavy force. Anticipate brittle plastics in older vehicles. Sun exposure weakens the structural integrity of the panel over time. Work slowly to prevent cracking the main housing during the extraction process.
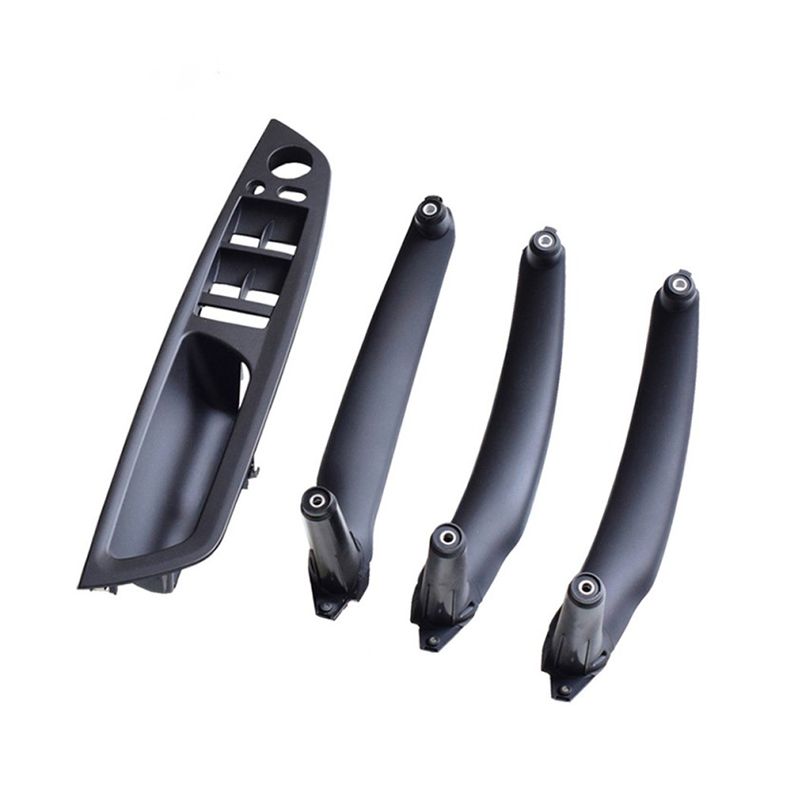
Following a strict sequential process ensures a successful repair. Skipping steps or rushing the teardown often leads to broken components and compromised vehicle safety. Read through all steps before touching the vehicle.
Always roll the window fully up before beginning the teardown. This pulls the glass out of the lower door cavity. It allows unobstructed access to the inner door mechanisms and linkage cables. If the window remains down, your tools will scratch the glass, or you will lack the clearance to extract the handle housing. Once the window is up, disconnect the negative battery terminal using a 10mm wrench. Isolate the cable so it cannot spring back and touch the battery post. Wait ten minutes for the system capacitors to discharge. This safety step prevents accidental side-impact airbag deployment and protects the power window switches from shorting out.
Use your nylon pry tools to unseat the decorative trim. Insert the wedge tool at the bottom edge of the trim piece where pry marks remain hidden. Apply gentle, even pressure. Do not force it. You want to release the retaining tabs without snapping them. Once the trim is removed, locate all securing bolts and screws. Document their original locations. Door panels often use varying screw lengths. Placing a long screw into a short hole during reassembly can puncture the exterior door skin.
Utilize the bottom-up prying method to release the panel. Insert a wide nylon pry tool between the bottom edge of the door panel and the metal door frame. Slide the tool along the gap to feel the hard plastic stem of each clip. Position your pry tool directly next to the clip. Lever the tool outward to pop the fastener out of the metal door shell. You will hear a loud, distinct popping sound. Work your way up both the front and rear sides of the door. Once all perimeter clips hang free, grab the armrest handle. Lift the entire door panel vertically. This upward motion clears the molded upper lip off the window sill weatherstripping and slides the panel over the manual lock stalk.
Do not pull the panel far away from the door yet. Reach behind the panel and unclip the power window, mirror, and lock wiring harnesses. Grab the connector housing, depress the locking tab with your thumb, and pull straight out. Never pull on the wires themselves, as this will rip the pins out of the harness. Next, release the door latch cable from the interior handle mechanism. Most vehicles use a Bowden cable with a metal ferrule. Pull the cable sheath out of the plastic bracket, rotate the wire 90 degrees, and slip the ferrule out of the handle hook.
Extract the broken handle housing from the door panel. Note how the factory secured it. Some handles use standard Torx screws. Others utilize melted plastic rivets. If you encounter plastic rivets, take a 3/8 inch drill bit. Drill the center of the melted plastic mushroom head just until the head spins off. Do not drill deep into the decorative trim. If the handle mounts directly to the metal door frame, you will need to peel back the moisture barrier. Use a utility knife to carefully slice the center of the black butyl glue. Do not tear the plastic sheeting. Peeling the barrier grants access to the rear of the handle mechanism.
Position the new assembly into the mounting location. High-quality auto interior door handles must seat perfectly flush against the door frame or panel. If you drilled out factory plastic rivets, you cannot reuse them. Secure the new handle using short pan-head screws (usually 1/2 inch, #8 size) and wide washers. Drive the screws into the remaining plastic posts. Do not overtighten, or you will strip the plastic. Alternatively, use a plastic welder or soldering iron to melt the new mounting posts flat. This ensures the structural rigidity required to withstand daily pulling force.
This phase represents the most critical step of interior door handle installation. Reattach the latch cable ferrule into the new handle housing hook. Snap the cable sheath back into its retaining bracket. This action sets the proper cable tension. Before reattaching the door panel, test the mechanism. Pull the handle to verify proper tension and ensure the latch mechanism releases smoothly. Temporarily reconnect the negative battery terminal. Plug in the window switch harness. Verify that the window rolls up and down without hitting the newly routed cables. Ensure no wiring is pinched.
Execute the reverse order of operations for reassembly. First, reseal the vapor barrier. Press the sliced butyl tape back together. If the old butyl is dry, apply a fresh bead of butyl tape to ensure a watertight seal. Reconnect all wiring harnesses securely. Lift the door panel and seat the top edge over the window sill. Align the lock stalk through its hole. Visually align the plastic retaining clips with their corresponding holes in the metal door frame. Strike the perimeter of the panel with the heel of your hand to seat the clips. Finally, secure all hidden screws and snap the decorative trim back into place.
Fastener Type | Typical Location | Removal Tool | Technique |
|---|---|---|---|
Torx Screws (T20/T25) | Behind trim pieces and armrests | Torx driver | Unthread completely before pulling panel |
Phillips Screws | Bottom edge of door shell | Phillips #2 driver | Remove and store in magnetic tray |
Plastic Push Clips | Perimeter of door panel | Nylon pry tool | Lever outward directly next to the clip stem |
Melted Plastic Rivets | Backside of handle housing | 3/8 inch drill bit | Drill center until mushroom head spins off |
Understanding potential pitfalls prevents minor repairs from escalating into costly damage. Anticipating these risks allows you to prepare the right tools and replacement parts beforehand.
Brittle plastic clips break during panel removal. This reality affects almost every vehicle over five years old. Cold weather makes these plastics even more fragile. Never attempt this repair without a vehicle-specific clip assortment on hand. If a clip breaks, remove the broken stem from the metal door frame using pliers. Slide a new clip into the door panel slot before reassembly. Reusing damaged clips results in a loose door panel that rattles while driving.
Tearing wiring harnesses creates severe electrical gremlins. Never let the door panel hang unsupported by its wires. The weight of the panel will pull the pins out of the connector housings. Use a bungee cord or mechanic's wire hooked to the door frame to suspend the panel. Alternatively, ask a second person to hold the panel while you disconnect the internal harnesses.
A misaligned latch cable renders the door inoperable. If the cable sheath is not fully seated in its retaining bracket, the inner wire lacks the tension required to actuate the latch. This means the door will not open from the inside. In severe cases of misalignment, the cable holds the latch partially open, preventing the door from latching shut. Always visually verify the seating of the cable ferrule and test the mechanism before panel reassembly.
The plastic vapor barrier serves a specific function. It prevents rainwater that enters the door cavity from leaking into the cabin. Damaging the butyl seal or tearing the plastic sheeting causes interior water leaks. This leads to soaked carpets, foul odors, and mold growth. Treat the vapor barrier with extreme care. Use a heat gun on a low setting to soften stubborn butyl glue. Always apply fresh butyl tape if the original seal loses its tackiness.
Evaluating the financial aspect of this repair requires comparing time investment against labor rates. Dealerships charge flat-rate labor, meaning you pay for a set number of hours regardless of how fast the technician works.
A first-time DIYer should allocate a realistic time estimate of one to three hours per door. This accounts for careful trim removal and learning the specific fastener locations. The cost of acquiring necessary non-marring tools and replacement parts remains minimal compared to professional labor. A quality trim tool set and a bag of clips cost a fraction of one hour of dealership labor.
Certain situations warrant outsourcing the job to a professional. Establish strict thresholds for DIY work. If your vehicle features door handles integrated into complex, side-impact airbag-equipped door panels, professional handling prevents accidental deployment. Furthermore, if diagnosing the issue reveals that the internal door latch mechanism itself has failed—not just the handle or cable—the repair requires dismantling the entire door lock assembly. This involves recalibrating electronic lock actuators, which requires specialized diagnostic software.
Completing this repair restores your vehicle's functionality and interior appearance. Take the following actions to execute your replacement:
Verify your exact vehicle make, model, year, and trim level to confirm part compatibility before ordering components.
Purchase a dedicated nylon auto trim pry tool kit and a vehicle-specific pack of replacement door panel retaining clips.
Disconnect the negative battery terminal and wait ten minutes before removing any door panels to prevent accidental airbag deployment.
Test the new handle's cable tension and release mechanism manually before snapping the door panel back into the frame.
A: A standard replacement takes one to two hours for a beginner. The exact timeframe depends on the door panel complexity, the number of hidden fasteners, and whether you need to drill out factory plastic rivets.
A: Mechanical failures require complete panel removal. However, you can resolve cosmetic stickiness caused by melting rubberized coatings using a snap-on cover. This cover installs directly over the existing handle without dismantling the door.
A: No. They are highly specific to the vehicle make, model, year, and trim level. You must match the exact part number to guarantee proper cable fitment, mounting hole alignment, and interior color matching.
A: Broken clips happen frequently, especially on older vehicles with brittle plastics. Purchase a pack of replacement clips specific to your vehicle brand before starting. Remove any broken clip stems from the metal door frame and install new clips before reassembly.
A: This indicates the latch cable or linkage rod sits improperly inside the new handle assembly. The cable sheath likely slipped out of its retaining bracket. This removes the tension required to pull the latch mechanism open.
A: Yes. You need a set of nylon or plastic auto trim removal tools. Using metal screwdrivers will gouge the soft interior plastic, snap the retaining tabs, and scratch the paint on the metal door frame.


