

close
Choose Your Site
Global
Social Media


Views: 0 Author: Site Editor Publish Time: 2026-09-30 Origin: Site


A broken vehicle door handle creates immediate frustration and poses a serious safety risk during emergencies. Owners face a tough choice when a handle snaps. You can pay high dealership labor rates or attempt a DIY repair. Improper DIY attempts often damage interior door panels, power window wiring, or side-impact airbag sensors. Drivers need an immediate solution when a handle fails. Rolling down the window to open the door from the outside works temporarily. A permanent fix remains necessary to restore vehicle safety and weatherproofing. This guide breaks down the technical evaluation of replacement parts. We cover the exact tools required and the step-by-step implementation process. You will learn how to successfully execute a car door handle replacement without causing secondary damage to the door assembly.
Accurate Diagnosis is Critical: Determine whether the failure lies in the handle's plastic housing, the metal return spring, a seized mechanism, or the internal lock control rod linkage before purchasing parts.
Material Quality Matters: Many OEM handles fail due to brittle plastic components; evaluating aftermarket upgrades (like reinforced metal pivots) can prevent recurring failures.
Panel Removal is the Highest Risk Phase: 90% of the labor involves safely removing the interior door panel without snapping retaining clips, tearing the moisture vapor barrier, or damaging manual window risers.
Safety First: Disconnecting the negative battery terminal is a mandatory prerequisite to prevent accidental deployment of door-mounted airbags and electrical shorts in window switches.
Defining a successful repair requires understanding the end goal. A proper fix restores factory-level latch operation, maintains weather seals, and ensures seamless central locking integration. Before tearing into the door panel, you must diagnose the exact point of failure. Replacing the entire assembly is not always necessary if a smaller linkage component has simply detached.
Door handles typically fail in one of three distinct ways. Recognizing these symptoms dictates your repair strategy. The floppy handle presents a complete lack of resistance when pulled. This symptom almost always points to a snapped metal return spring or a broken plastic pivot point within the housing. When the pivot breaks, the handle cannot retract flush against the door skin.
The disconnected handle feels normal. It pulls with standard spring resistance but fails to unlatch the door. This indicates a failure downstream from the handle itself. Usually, the lock control rod or tension cable has stretched, snapped, or popped out of its plastic retaining clip. The stuck handle refuses to move. This issue frequently plagues the driver side front door. A jammed handle often stems from a seized lock cylinder, heavily rusted linkage rods, or a mechanically bound latch mechanism requiring deep lubrication or a complete car door handle replacement.
Before ordering parts, simulate the door closing by pushing a screwdriver shaft into the latch jaws on the edge of the door. If the latch clicks shut but pulling the interior cable or exterior rod fails to release it, the handle mechanism is definitely at fault. If the latch itself refuses to click shut or release even when manipulating the lever directly, you need a new door latch, not just a handle.
Understanding the mechanical complexity between interior and exterior handles prevents diagnostic errors. Exterior handles endure harsh environmental conditions. They house complex components including the physical lock cylinder, heavy-duty return springs, and rubber weather gaskets. They connect to the latch via rigid metal rods. Conversely, car interior door handles operate in a protected climate. They primarily rely on a single steel tension cable, known as a Bowden cable, to release the latch. This fundamental difference means interior handles usually fail at the plastic housing, while exterior handles suffer from linkage corrosion and spring fatigue.
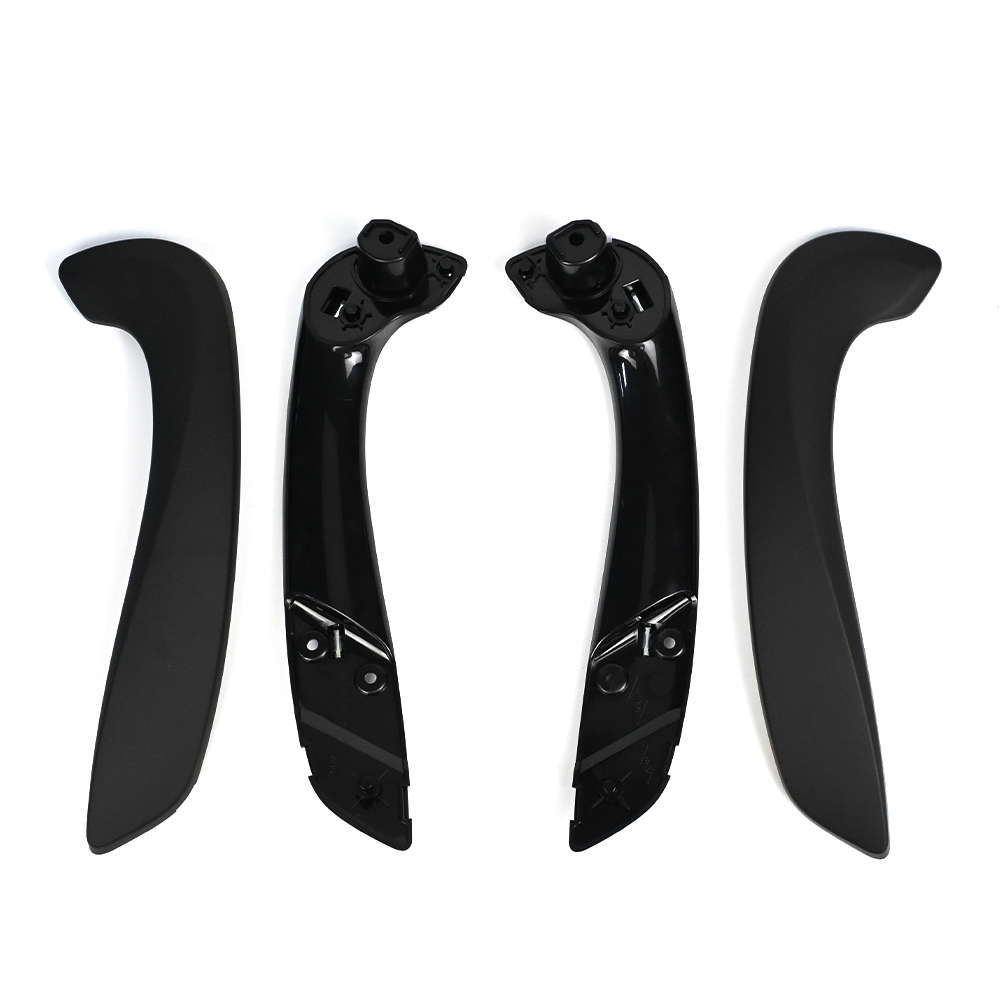
Choosing the correct replacement part determines the longevity of your repair. Original Equipment Manufacturer parts guarantee exact fitment but often carry the same design flaws that caused the original failure. Third-party aftermarket alternatives range from cheap replicas to highly engineered upgrades that solve factory defects.
Factory handles frequently suffer from plastic degradation. Automakers utilize standard ABS plastic to reduce vehicle weight and manufacturing costs. Over time, UV exposure and the repeated mechanical stress of pulling the handle cause this plastic to become brittle. The plastic car inside door handle is often the first interior component to snap during cold weather when polymers lose their flexibility.
Smart mechanics look for aftermarket brands that re-engineer the front interior door pull handle. Upgraded parts often feature metal reinforcements at the pivot points or utilize higher-density polymers. These structural improvements ensure the replacement part outlasts the rest of the vehicle's interior.
When selecting a replacement, evaluate the fitment tolerance. Cheap aftermarket handles often suffer from poor molding. This leaves unsightly panel gaps on the exterior that allow rainwater to bypass the weather stripping, leading to internal door rust and electrical shorts. Finish matching is equally important. Ensure the texture and color code match your existing interior trim or exterior paint perfectly.
Pay strict attention to driver versus passenger specifications. Driver's side handles require specific cutouts for the key lock cylinder. Rear handles lack these cutouts. Ordering a generic handle without verifying the exact door location will halt your repair process immediately.
Part Type | Fitment Accuracy | Material Durability | Common Flaws |
|---|---|---|---|
OEM (Factory) | Exact match to factory specs | Standard ABS plastic | Prone to repeating the original failure |
Standard Aftermarket | Variable (check reviews) | Basic polymers | Potential panel gaps or color mismatch |
Upgraded Aftermarket | High precision | Reinforced metal pivots, high-density plastics | Requires careful brand selection |
Preparation prevents cosmetic damage and dangerous electrical hazards during the teardown process. Modern vehicle doors house complex wiring harnesses, capacitive touch sensors, and explosive airbag modules. Approaching this job without the right tools guarantees broken trim pieces and potential injury.
Gathering the correct tools before starting ensures a smooth workflow. Do not substitute proper automotive tools with household items like flathead screwdrivers, which will permanently gouge your paint and interior plastics.
Tool Name | Specific Application | Risk of Not Using |
|---|---|---|
Nylon Trim Pry Tools | Releasing plastic door panel clips and switch bezels | Gouged paint, cracked interior plastics, broken clips |
Magnetic Torx/Metric Sockets | Removing handle mounting nuts inside the door cavity | Dropping hardware into the unreachable bottom door seam |
90-Degree Pick Tool | Unclipping delicate plastic linkage retainers | Snapping the linkage clips, requiring a full latch replacement |
Butyl Rubber Tape | Resealing the moisture vapor barrier | Water leaking into the cabin, soaking carpets, causing mold |
Window Crank Removal Tool | Releasing the omega-clip on manual windows | Destroying the crank handle or tearing the door panel fabric |
Isolating the vehicle's electrical system is a non-negotiable first step. Modern doors contain Side Impact Sensors and Supplemental Restraint System airbag modules. Disconnect the negative battery terminal and wait at least fifteen minutes before touching the door panel. This allows the airbag module's backup capacitors to discharge completely. Failing to do this risks accidental airbag deployment and severe electrical shorts in the power window switch modules.
Replacing an exterior handle requires patience and spatial awareness. You will be working blind inside the door cavity, relying on touch to manipulate linkages. Follow these steps methodically to avoid dropping hardware into the bottom of the door shell.
Removing the Inner Door Panel: Begin by locating all hidden mounting screws. Automakers hide these fasteners behind decorative trim pieces, under the armrest rubber inserts, and behind speaker grilles. Use your nylon trim tool to gently pry these covers away. Once you remove all screws, start at the bottom corner of the door panel. Insert a wide trim tool and pry outward to pop the perimeter retaining clips. Work your way around the sides. Lift the panel straight up to clear the window sill channel.
Disconnecting Electronics: When disconnecting electrical harnesses, never pull by the wires. Always depress the plastic locking tab on the connector housing and pull the plug straight out. Older vehicles may have brittle connectors that require a gentle wiggle. If a connector refuses to budge, use a small pick tool to lift the locking tab slightly while pulling.
Peeling Back the Vapor Barrier: Behind the door panel sits a plastic sheet glued to the metal door frame with sticky black butyl rubber. This is the moisture vapor barrier. It prevents rainwater that slips past the window seal from soaking your interior carpets. Use a razor blade or a plastic scraper to carefully slice the butyl glue as you peel the plastic back. Do not tear the plastic sheet. Fold it out of the way and tape it to the door frame to maintain clear access to the internal cavity.
Accessing the Lock Mechanisms: Shine a flashlight into the door cavity. Locate the back of the exterior handle. You will see metal rods connecting the handle to the door latch. These rods are held in place by swinging plastic retaining clips. Use a pick tool to unclip the plastic retainers and push the metal rods out of their mounting holes. Be extremely gentle. If you break these plastic clips, the rods will not stay attached to the new handle.
Unbolting the Old Handle: Locate the mounting nuts securing the handle to the door skin. These are usually 10mm nuts or Torx bolts accessed through specific holes in the inner door metal. Use a magnetic socket to remove them. A magnetic socket prevents the nuts from falling into the unreachable bottom crevices of the door. If you are replacing a driver's side handle, you must carefully detach the lock cylinder. Remove the horseshoe retaining clip, slide the cylinder out, and transfer it to the new handle assembly.
Installation and Alignment: Guide the new handle into the exterior door skin. Ensure the rubber weather gaskets sit completely flat against the paint. A pinched gasket causes wind noise and water leaks. Thread the mounting nuts on by hand to prevent cross-threading, then tighten them to specification. Reconnect the metal linkage rods and snap the plastic retaining clips shut. Reconnect the battery temporarily to test the handle's operation from the outside before reassembling the vapor barrier and door panel.
Before installing the new exterior handle, take the opportunity to lubricate the internal door latch mechanism. Spray a high-quality white lithium grease or silicone lubricant directly onto the latch jaws and the moving pivot points. Do not use standard penetrating oil, as it evaporates quickly and attracts dust. Lubricating the latch reduces the mechanical resistance the new handle must overcome, significantly extending its lifespan.
Sometimes, the internal return spring or latch linkage refuses to align with the new handle. The mechanism might sit too far inside the door cavity to reach. Utilize the shoelace trick. Loop a strong piece of string or a clean shoelace around the internal latch lever. Pull the string outward to hold the mechanism in place while you slide the new handle into position. Once the handle engages the lever, pull one end of the string to slide it out. This technique saves hours of frustration when dealing with heavily tensioned door latches.
Interior handle replacement is generally less intrusive than exterior work. However, it requires extreme care to avoid scratching highly visible interior trim pieces. The process varies slightly depending on whether the handle is mounted to the door panel itself or bolted directly to the metal door frame.
Detaching the Trim: Most interior handles sit inside a plastic bezel or trim surround. Use a thin nylon pry tool to release the tabs holding this bezel in place. Pry gently from the least visible edge, usually the bottom. If the handle is integrated into the main door panel, you must remove the entire door card following the same procedure outlined in the exterior handle section.
Disconnecting the Latch Cable: Once you expose the back of the handle, you will see the Bowden cable. This cable features a metal ball or a Z-bend wire at the end, seated inside a slot on the back of the handle lever. Pull the cable sheath backward to release the tension, then slip the ball-end out of the retaining slot. Unclip the cable housing from the handle assembly bracket.
Swapping the Assembly: Unbolt the broken housing. Some modern vehicles use plastic rivets to secure the interior door handle assembly to the door card. If you encounter plastic rivets, you must carefully drill the heads off to remove the old unit. Secure the new assembly using the provided screws or short self-tapping screws with washers to replace the drilled rivets. Ensure the new handle sits completely flush against its mounting surface.
Testing Before Reassembly: Seat the Bowden cable into the new handle. Ensure the cable housing clips securely into the bracket. If this housing is loose, pulling the handle will just move the cable sheath instead of actuating the latch. Test the door operation from the inside multiple times. Verify that the central locking switch operates correctly. If you are working on a rear door, ensure the child safety locks function properly before snapping the door panel back into place.
If your vehicle utilizes plastic or metal rivets to secure the handle housing, you need a power drill. Select a drill bit slightly larger than the center pin of the rivet. Drill straight into the center until the head of the rivet spins off. Push the remaining body of the rivet through the hole. When installing the new handle, use a manual rivet gun with matching automotive rivets, or substitute them with short, wide-flange self-tapping screws. Ensure the screws do not protrude through the back of the door panel where they could scratch the window glass.
Deciding whether to tackle this project yourself involves weighing significant labor savings against the time investment and the risk of breaking auxiliary components. A methodical approach makes this a highly rewarding DIY task, but certain vehicle architectures complicate the process.
The primary advantage of a DIY repair is avoiding steep dealership labor rates. You only pay for the replacement part. However, the trade-off involves time and risk. Snapping a brittle window switch bezel or tearing the vapor barrier turns a simple handle swap into a cascading series of interior repairs. You must possess the patience to hunt for hidden screws and the delicate touch required to manipulate plastic clips.
Certain scenarios demand professional intervention. Complex European vehicles often feature interior door modules where the window regulator, latch, and handle are riveted to a single structural shield. Accessing the handle requires drilling out heavy-duty rivets and removing the window glass entirely. Furthermore, high-end vehicles feature exterior handles with integrated capacitive touch sensors for keyless entry. Replacing these handles often requires professional diagnostic software to recalibrate the vehicle's security module. If your vehicle falls into these categories, outsourcing the job prevents costly electronic damage.
Factor | DIY Repair | Professional Repair |
|---|---|---|
Labor Expense | Zero labor fees | High hourly dealership or shop rates |
Time Investment | Requires researching, sourcing parts, and manual labor | Requires dropping off the vehicle and waiting |
Risk Level | Potential to break trim clips or damage wiring | Guaranteed work, often backed by a shop warranty |
Tool Requirements | Requires purchasing specific trim and socket tools | Shop provides all specialized equipment |
Order the correct interior or exterior handle assembly based on your specific vehicle identification number to guarantee exact fitment.
Purchase a non-marring nylon trim tool kit to safely remove interior panels without scratching the plastics or snapping retaining clips.
Allocate roughly two hours of daylight for the repair to ensure you have ample visibility to manipulate the internal door linkages.
Disconnect the negative battery terminal before starting the teardown to prevent accidental airbag deployment and electrical shorts.
A: It depends on the vehicle model. Some older vehicles allow you to swap just the plastic lever by removing a pivot pin. Most modern vehicles integrate the lever, return spring, and mounting bracket into a single sealed unit. Purchasing the complete assembly is usually required and ensures all tension components are fresh.
A: A first-time DIY mechanic should allocate roughly two hours for the job. The majority of this time is spent carefully removing the interior door panel and peeling back the vapor barrier. Once you access the internal cavity, swapping the actual handle hardware usually takes less than twenty minutes.
A: In most standard vehicles, you do not need to remove the window glass. You simply roll the window all the way up to move the glass out of the way, providing access to the handle nuts. Some complex European models use a structural inner door shield that requires glass removal.
A: A handle that won't sit flush usually indicates a pinched rubber weather gasket or a misaligned internal linkage rod. Remove the mounting nuts and pull the handle back out. Check that the plastic swinging clips aren't binding against the door skin and ensure the rubber seal is seated smoothly.
A: The shoelace trick involves looping a string around the internal latch mechanism lever inside the door cavity. You pull the string to hold the heavily tensioned lever outward, allowing you to easily slide the new exterior handle's pivot arm into the correct engagement slot. Once seated, you pull the string free.
A: No. The physical lock cylinder that accepts your key is a separate component from the door handle housing. During the replacement process, you will unclip your original lock cylinder from the broken handle and transfer it directly into the new handle assembly, allowing you to keep your original keys.


